CatDamit
- Home >
- A+ Innovation > CatDamit
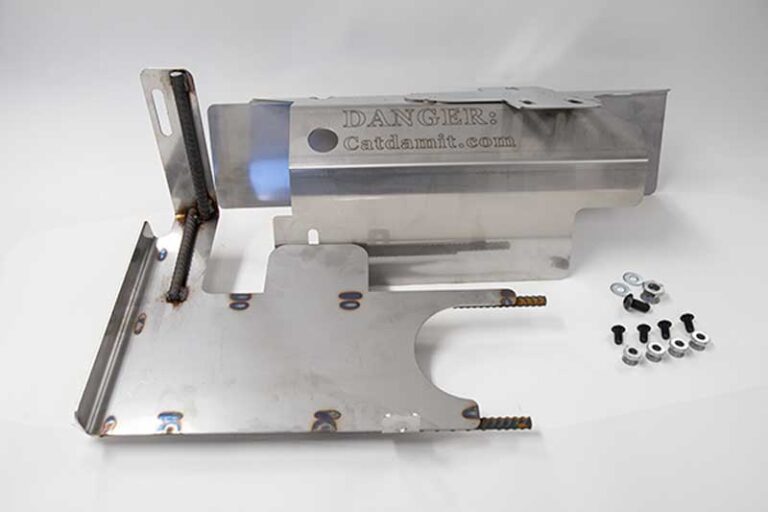
DANGER: This cat protection device is built out of very robust materials. Trying to remove this sleeve can result in serious injury. Truck owners, please contact us for removal assistance. Cat thieves, f-off
Owning and running a fleet is hard enough without added miscreant interference. Unfortunately, a-hole catalytic convertor thieves are real and real disruptive. A cat thief can strike and be gone in under 60 seconds. In return for a few, ill-begotten dollars of recycled precious metals, you are left with a downed truck and thousands of $’s of repairs. We know because Allvan was hit too.
Catalytic convertor thieves require easy and quick access. CatDamit to the rescue. Our contraption is not perfect, but it is the best deterrent we have found. We build these kits using thick stainless steel plates, rebar reinforcements, sharp edges (really,) extensive welding and breakoff securing bolts. Currently, these are only sized to work with Ford F650 and F750 gas-burner chassis. Need one sized for Isuzus? Ask and we will see what we can do.
See video and install instructions below. Please call us to order or discuss distribution opportunities.
Written Install Instructions:
STEP 1: Begin with the rebar plate. Turn 90 degrees (rebar facing passenger side frame rail) and raise the rebar plate between the passenger side frame rail and the catalytic converter. Once it has passed the catalytic converter, turn it back to the original position and place it on top of the catalytic converter.
STEP 2: Slide the C-channel bracket between the support bar and the catalytic converter. Ensure the holes in the C-channel bracket are lined up with the holes on the support bar. There should be a 1/4” gap between the C-channel bracket and the passenger side frame rail.
STEP 3: Place 2x 3/8” bolts and 1x 1/2” bolt in the holes on the mounting plate of the C-channel bracket.
STEP 4: Move the rebar plate into the 2 holes located on the front of the C-channel bracket (closest to the rear).
STEP 5: Hand-tighten nuts onto the bolts (cone side up) that connect the C-channel bracket to the support bar.
STEP 6: Use a 3/4” socket and a 7/32” tamper resistant hex L key to secure the 3/8” bolts. Use a 1” socket and a 5/16” hex L key to secure the 1/2” bolts. They are fully fastened after the hex L portion of the nut has broken off.
STEP 7: Align the tab on the rebar plate to the slot on the C-channel bracket (closest to driver side frame rail) and insert a 3/8” bolt from inside the C-channel bracket. Hand-tighten the 3/8” nut.
STEP 8: Align the horizontal slot on the rebar plate to the hanger on the passenger side frame rail. Insert a 3/8” bolt with a 3/8” washer. Place another 3/8” washer on the back side of the bolt. Hand-tighten the 3/8” nut and use the 3/4″ socket and 7/32” tamper resistant hex L key to fully fasten.
STEP 9: Fully fasten the bolt from step 7 with the 3/4″ socket and 7/32” tamper resistant hex L key.
Tools Needed:
3/4” socket
1” socket
7/32” tamper resistant hex L key
5/16” hex L key